
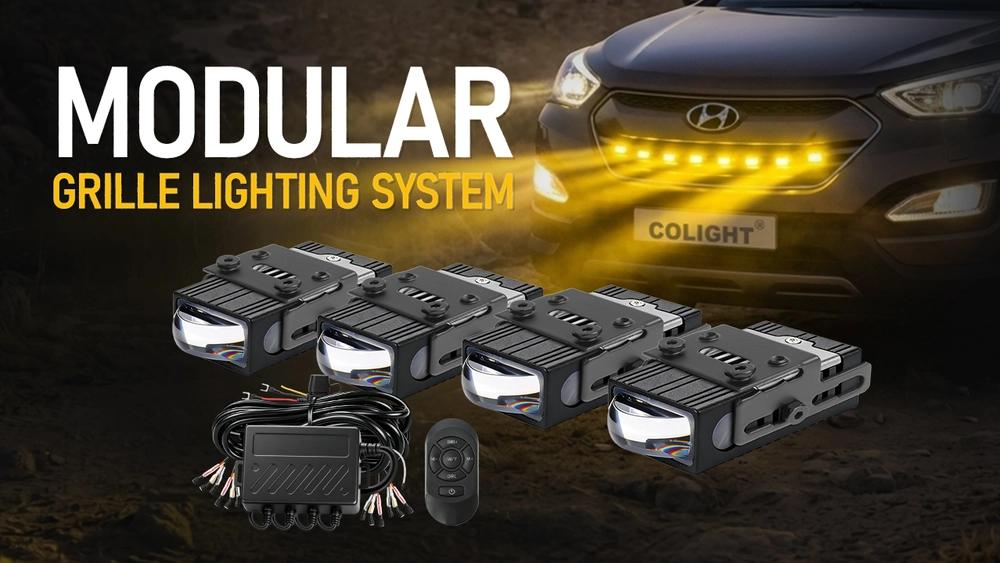
The COLIGHT Modular Grille Lighting System combines ultra-slim Bi-LED projector lights with a dedicated multi-channel controller and wireless remote. Available in 4-light, 6-light, and 8-light configurations, the system is designed to give you more flexibility in both installation and lighting effects.
Whether you're installing the lights in a honeycomb grille, Jeep vertical grille, or a custom front-end setup, understanding the controller wiring and remote functions will help you get the most out of the system.

Understanding Grille Lighting System
Before getting into the wiring, it's important to understand how the system is configured. The grille lights are available in two housing thicknesses:
- 17MM Ultra-Slim — Best suited for narrow grille gaps and discreet installations.
- 21MM Standard — A better choice for wider grille openings and applications such as Jeep vertical grilles and diamond-pattern grilles.
The controller configuration is matched to the number of lights in your kit:
- 4 lights → 4-channel controller
- 6 lights → 6-channel controller
- 8 lights → 8-channel controller
All versions use the same 3-wire light design, making the light-side wiring consistent across the different configurations.
Understanding the Controller Wiring
The controller uses several wires, but not every wire needs to be connected.
The red wire is the main positive power connection, while the black wire connects to ground/negative.
There is also a long positive control/power wire. This wire must be connected to positive power. It can be connected directly to the battery, but connecting it to an ACC power source is recommended. The reason for using ACC is simple: it helps prevent unnecessary power draw when the vehicle is turned off.
The controller also has a short signal-receiving wire. This is the antenna for the wireless remote and does not need to be connected to anything.
Controller Wiring at a Glance
| Wire | Function | Connection |
|---|---|---|
| Red | Main positive power | Positive |
| Black | Ground | Negative / Ground |
| Long wire | Control / power | Positive or ACC |
| Short wire | Wireless signal receiver | Do not connect |

Why Use an ACC Connection?
For vehicle installations, we recommend connecting the long positive wire to an ACC circuit rather than keeping the system permanently connected to battery power.
An ACC circuit is powered when the vehicle's ignition is switched on and loses power when the vehicle is switched off. This helps prevent the lighting system from continuing to draw power while the vehicle is parked.
If you're not familiar with your vehicle's fuse box, a simple test light can help identify an appropriate ACC circuit.
With the vehicle switched off, look for a fuse that does not show power. Then turn the ignition on and test it again. If the fuse becomes powered after the vehicle is switched on, it is an ignition-switched circuit.
Always confirm that the selected circuit is appropriate for your vehicle and installation.
First-Time Setup & Remote Pairing
Once the wiring is complete and the system receives power, the lights will automatically enter the Welcome Mode.
For the first installation, the wireless remote needs to be paired with the controller.
After the Welcome Mode finishes, press and hold the Power button on the remote for approximately 10 seconds. You can then press the other buttons to check whether the lights respond correctly.
Once paired, the remote does not normally need to be paired again.

One Remote, Multiple Lighting Functions
The included wireless remote controls both the static lighting modes and the dynamic effects.
The left and right buttons are used to cycle through the dynamic lighting effects.
The center button switches between the main static lighting modes:
- Yellow
- White
- Yellow + White
The system also includes a DRL mode, which operates at a reduced brightness level for a softer lighting appearance. White DRL operates at approximately 15% brightness, while yellow DRL operates at approximately 5% brightness.
3 Static Lighting Modes
The three main lighting modes are designed for different driving conditions and visual preferences.
Yellow Low Beam
The 3000K yellow output provides better contrast in conditions such as fog, rain, snow, and dusty environments.
White High Beam
The 6000K white output provides brighter auxiliary illumination for nighttime driving and off-road use.
Yellow + White
Both colors illuminate together for a stronger visual effect and maximum auxiliary output.
Important: The terms "Low Beam" and "High Beam" describe the lighting modes of these auxiliary grille lights. They are not intended to replace the factory high/low beam functions of your vehicle's headlights.

7 Dynamic Lighting Effects
Beyond the three static modes, the controller provides seven dynamic lighting effects that can be selected with the wireless remote.
Left-to-Right / Right-to-Left Flow
The lights illuminate sequentially from one side to the other and then reverse direction.
Breathing Effect
The lights gradually brighten and dim to create a smooth breathing effect.
Strobe Effect
A rapid flashing pattern designed primarily for styling and visual effects.
Center-Out Flow
The lighting begins in the center and expands outward toward both sides.
Single-Light Chase
Individual lights illuminate sequentially from left to right and then return from right to left.
Center Chase
A single light moves outward from the center and then returns toward the center.
Dual-Color Chase
One of the most distinctive effects in the system. The yellow lights remain illuminated while the white lights illuminate sequentially from left to right. The colors then switch, with the white lights remaining illuminated while the yellow lights chase across the system.
This gives the 4-, 6-, or 8-light setup a much more dynamic appearance than conventional static grille lighting.
Your Last Lighting Mode Is Remembered
One useful feature of the controller is its memory function.
The system remembers the lighting mode that was active when you last turned the lights off. When the system is powered on again, it automatically returns to that previous mode.
For example, if you finish your last drive using the yellow-and-white mode, the system will return to that mode the next time it is powered on.
You don't need to select your preferred mode again every time.
Where Should the Controller Be Installed?
Controller placement can affect wireless reception.
For the best results, position the controller as close to the windshield area as practical. Avoid placing it deep inside the engine bay or near areas exposed to excessive heat.
The wireless remote and controller should ideally be within approximately 2 meters (6.6 ft) of each other.
Keeping the controller in a relatively open location also helps maintain a more reliable wireless signal.
 Installing the Lights on Your Grille
The included C-Clip mounting brackets are designed to work with grille slats up to approximately 3.9MM thick. We also have optional brackets for 11mm openings. Order the brackets for 11mm openings here.
The compact housing makes these lights particularly suitable for locations where conventional auxiliary lights are too large.
The 17MM version is the better choice when installation space is extremely limited. The 21MM version provides more flexibility for wider grille openings, such as Jeep vertical grilles and diamond-pattern grilles.
Before installation, always check the actual thickness, shape, and available clearance of your grille.
Choosing the Right Lighting Setup
The modular design allows you to build the system around your vehicle rather than adapting your vehicle to a fixed lighting package.
A 4-light setup works well for a clean and relatively subtle grille installation.
A 6-light setup provides more coverage and a stronger visual presence.
An 8-light setup is ideal for larger grilles, custom front-end builds, and drivers who want a more prominent lighting arrangement.
Combined with the 17MM or 21MM housing options, you can choose both the physical fit and the number of lights that best match your vehicle.
Frequently Asked Questions
Do I need to connect the short wire on the controller?
No. The short wire is the wireless signal-receiving antenna and should remain unconnected.
Does the long wire need to be connected?
Yes. The long control/power wire must be connected to positive power. We recommend connecting it to an ACC source.
Can I connect the system directly to the battery?
Yes, the long positive wire can be connected to battery power, but ACC connection is recommended to help prevent unnecessary power draw when the vehicle is switched off.
Do I need to pair the remote every time?
No. Pairing is normally required only during the initial setup.
Will the system remember my previous mode?
Yes. The controller remembers the last selected lighting mode and restores it when the system is powered on again.
How many lights can one controller operate?
Use the controller designed for your configuration:
4CH → 4 lights
6CH → 6 lights
8CH → 8 lights
Can these lights replace my factory headlights?
No. They are auxiliary grille lights intended to supplement your vehicle's existing lighting system.
Final Tips for a Clean Installation
The best results come from treating the system as a complete lighting setup rather than simply mounting the lights wherever there is space.
Choose the light thickness based on your grille clearance, use the appropriate controller for the number of lights, position the controller where the wireless signal can reach it reliably, and use an ACC connection whenever practical.
Once installed, the system gives you a combination of practical yellow and white auxiliary lighting, multiple dynamic effects, and a clean hidden-grille appearance—all controlled from a single wireless remote.
Ready to build your setup? Explore the COLIGHT Modular Grille Lighting System and choose your 17MM or 21MM lights with a 4-, 6-, or 8-light controller configuration.